
Executing the procedure from a button or shape
Sometimes, you might like the idea of assigning the macro to a button (or any other shape) on a worksheet. To assign the macro to a button, follow these steps:
1. Activate a worksheet.
2. Add a button from the Form Controls group.
To display the Form Controls group, choose Developer➪Controls➪Insert

3. Click the Button tool in the Form Controls group.
4. Drag in the worksheet to create the button.
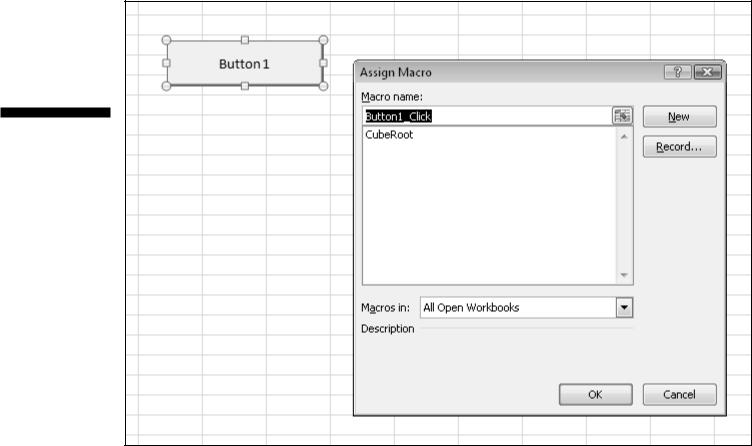
After you add the button to your worksheet, Excel jumps right in and displays the Assign Macro dialog box shown in Figure.
5. Select the macro you want to assign to the button.
6. Click OK.
After you’ve made the assignment, clicking the button will execute the macro — just like magic.
Note that the Assign Macro dialog box also gives you an opportunity to record a macro (by clicking the Record button). Or click the New button, and Excel will insert an empty Sub procedure with the name you specify. Most of the time, though, you’ll assign an existing macro to a button.
When you add a button, note that the drop-down box shows two sets of con-trols: Form Controls and ActiveX Controls. These two groups of controls look similar, but they are actually very different. In practice, the Form Controls are easier to use.
You can also assign a macro to any other shape or object. For example, assume you’d like to execute a macro when the user clicks a Rectangle object.
1. Add the Rectangle to the worksheet.
Insert a rectangle by using the Insert➪Illustrations➪Shapes command.
2. Right-click the rectangle.
3. Choose Assign Macro from its shortcut menu.
4. Select the macro from the Assign Macro dialog box.
5. Click OK.
After performing these steps, clicking the rectangle will execute the assigned macro.


No comments:
Post a Comment